
Grip condition affects shot accuracy more than most recreational golfers acknowledge. A worn or hardened grip causes the hands to compensate during the swing, which disrupts both timing and club face control. Learning to regrip at home is a genuinely useful skill that cuts equipment costs and keeps clubs performing consistently. With the right setup and a little patience, the entire process takes no longer than an afternoon.
Tools and Materials Required
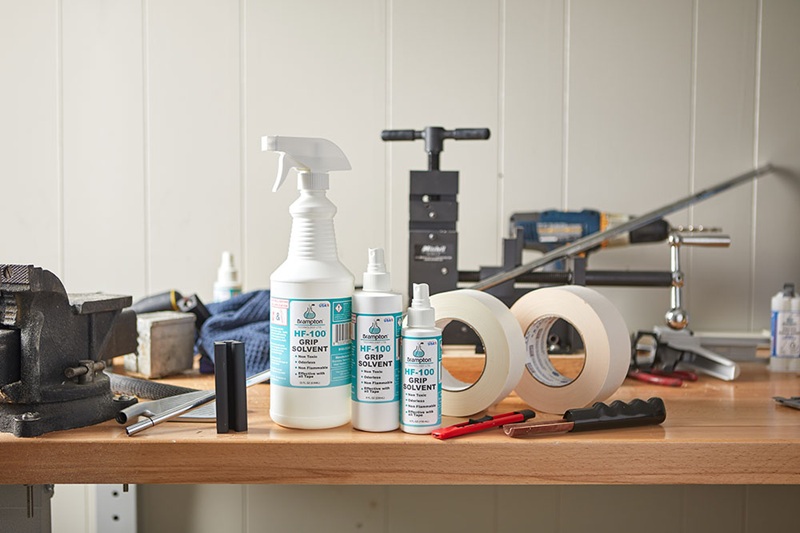
Having everything ready before starting is half the battle. Stopping mid-process to track down a missing item breaks concentration and risks a sloppy result.
Golfers who want a solid foundation before picking up a blade should first review how to regrip golf clubs, a comprehensive guide on tape alignment, solvent application, and positioning techniques that first-timers frequently get wrong. Pairing that reference with the materials below makes the process far less frustrating.
What to Collect
- Replacement grips matched to the golfer’s hand size
- Double-sided grip tape in two-inch width
- Grip solvent or mineral spirits
- A hook blade or utility knife
- A rubber vise clamp and bench vise
- Clean rags or paper towels
Grip sizing deserves more attention than it usually gets. An undersized grip encourages excessive wrist movement through impact, while an oversized one limits proper hand release. Standard sizing works for most adults, but midsize and oversized options are worth considering for players with larger hands.
Step-by-Step Regripping Process
Working through each stage in sequence produces the cleanest results. Rushing or skipping steps leads to grips that feel uneven or fail to seat properly.
Removing the Old Grip
Secure the club in the vise using the rubber clamp to avoid shaft damage. Run the hook blade carefully under the existing grip and cut along its length. Peel it back and use a solvent-soaked rag to remove every trace of old tape residue. The shaft needs to be completely clean and dry before tape goes on.
Applying Fresh Tape
Lay a strip of double-sided tape along the shaft, beginning just beneath the top cap and running the full length of the grip area. Press it flat to eliminate air pockets. Keep the backing in place until the solvent is ready to apply.
Installing the New Grip
Pour solvent into the new grip and shake it to coat the inside evenly. Remove the tape backing and apply a small pour of solvent over it as well. Slide the grip onto the shaft in one fluid motion since solvent evaporates quickly. Check that the logo or alignment marking lines up with the club face before the solvent begins to set. Rest the club flat and leave it undisturbed for several hours.
Common Errors to Avoid
Even experienced DIYers make predictable mistakes on their first few attempts. Knowing what to watch for makes the difference between a grip that lasts and one that needs redoing within weeks.
Misaligned Grips
Alignment errors are among the most common complaints from first-timers. Once the solvent cures, correcting the position means stripping the grip and starting from scratch. A quick check immediately after installation takes seconds and prevents that frustration entirely.
Insufficient Solvent
Skimping on solvent causes the grip to drag and catch partway down the shaft. Applying a generous amount inside the grip and over the tape surface allows it to slide into position cleanly without bunching or tearing.
Skipping Shaft Cleaning
Leftover adhesive from the old tape creates raised spots beneath the new layer. Those bumps telegraph through the grip material and affect feel during play. Taking the time to clean the shaft thoroughly before taping keeps the surface even and the final result professional.
Rushing the Cure Time
Solvent requires several hours to fully evaporate and allow the adhesive to bond securely. Gripping and swinging a club before that window has passed risks rotating or loosening the grip under pressure. Waiting at least six to eight hours, or leaving the clubs overnight, guarantees a firm, lasting hold.
Conclusion
Regripping at home is one of the more practical maintenance habits a golfer can develop. The upfront cost in tools is modest, and the process becomes faster with each attempt. Paying attention to shaft prep, solvent volume, and cure time separates a grip that lasts a full season from one that shifts after a few rounds. Done carefully, home regripping delivers results that hold up just as well as anything a shop would produce.