Paving your own driveway, patio, or garden path can be a rewarding project that not only enhances the beauty of your home but also adds significant value to it. With the right tools, materials, and techniques, you can achieve professional results from a DIY paving project. Here’s how you can transform your outdoor space with a touch of professional finesse.
Plan Your Project
The first step to achieving a professional finish in DIY paving is meticulous planning. Measure the area you wish to pave and calculate the quantity of materials you’ll need. Planning ensures you have everything you need on hand and helps avoid unnecessary delays. Decide on the type of paving stones or slabs you want to use, and think about the pattern you’d like to create. A well-thought-out design is the cornerstone of a successful paving project.
Prepare the Ground
A solid foundation is crucial for a durable and stable paved surface. Start by clearing the area of any vegetation, rocks, or debris. Next, excavate the soil to a depth of about 150-200mm. This depth allows space for a sub-base and the paving materials. Once excavated, compact the soil to create a firm base. Laying a geotextile membrane at this stage can help prevent weed growth and maintain the integrity of your paving.
Lay the Sub-base
The sub-base is vital for the stability of your paving. Use a high-quality crushed stone or gravel and spread it evenly over the excavated area. The sub-base should be about 100mm thick. Compact the sub-base thoroughly using a plate compactor to ensure it is solid and level. This step is essential to prevent future sinking or shifting of your paving stones.
Add a Sand Layer
After the sub-base, add a layer of sharp sand about 50mm thick. This sand layer provides a smooth and even surface for the paving stones. Use a screed board to level the sand, ensuring it is perfectly flat and consistent in depth. Avoid walking on the sand once it’s levelled to keep it even.
Lay the Paving Stones
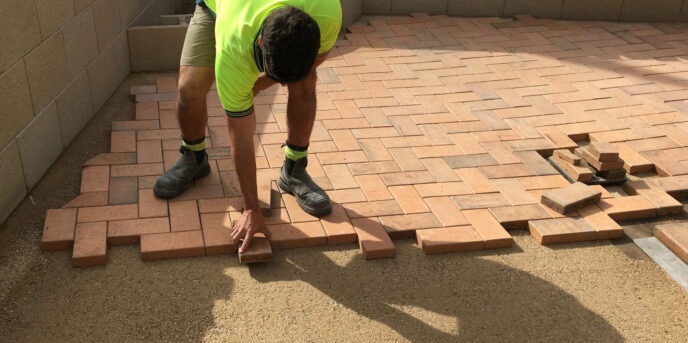
Now comes the exciting part: laying the paving stones. Start from one corner and work your way across the area. Lay the stones carefully, ensuring each one is level and spaced evenly. Use spacers to maintain consistent gaps between the stones. Tap each stone gently with a rubber mallet to set it firmly in place.
Jointing the Paving
To achieve a professional finish, the joints between your paving stones must be filled correctly. This is where Pro Joint Titan comes into play. This high-quality jointing compound is easy to use and provides a strong, durable finish. Simply brush the compound into the joints, ensuring it fills them completely. Pro Joint Titan is ideal for DIY projects because it is user-friendly and offers a professional-grade result.
Compact and Finish
Once the joints are filled, lightly compact the entire area again to ensure everything is set firmly in place. This step helps to lock the stones and the jointing compound together, providing a stable and long-lasting surface. Finally, sweep the surface to remove any excess compound and debris.
Maintenance Tips
To keep your newly paved area looking pristine, regular maintenance is key. Sweep the surface regularly to remove dirt and debris. Occasionally, wash the paving with a mild detergent and water to prevent stains and moss growth. Inspect the joints periodically and reapply Pro Joint Titan if necessary to maintain the integrity of the joints.
By following these steps, you can achieve professional results with your DIY paving project. With careful planning, the right materials, and attention to detail, your paved area will not only look stunning but also stand the test of time. So, get started on your paving project today and transform your outdoor space into a professional-looking haven.


