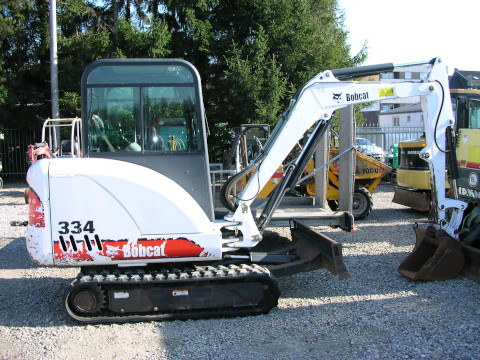
You may be required to remove the final drive motor from your mini excavator for numerous reasons. But if you’ve never removed a final drive, then it can be intimidating. Whilst it will take some time. It’s well worth making the effort to understand how to do it safely. In this post, we will give you a few tips and tricks to remove the final drive from a bobcat mini excavator. So that removing the final drive will be that little bit easier.
How to remove a final drive motor from a mini excavator?
Whilst all mini-excavators, compact excavators, and mini-diggers will one day need their final drive motor pulled. You shouldn’t simply assume the same approach can always be taken across brands and machines. This means that, as with any bit of machinery, you should always start with the manual.
Nevertheless, there are a few tips that will always ensure you do a good job. Here, we outline our top tips for final drive motor removal:
Tip 1: Park up carefully
This might seem obvious. But sometimes it is easy to get set up for a job in one place, only to realize it’s not the right place for the task. When it comes to pulling a final drive, you want to be somewhere flat, clean, and secure. This will make it easier to prop up the bobcat without the risk of injury. And help to prevent contaminants from getting into unwanted places.
Tip 2: Get Cleaning
Before you start taking your mini excavator apart you want it to be squeaky clean. A pressure hose is a great way to blast off dirt and grease that has become more ingrained. Doing this before you start will help to keep dirt from getting into unwanted places during the removal process. And if you’re removing the final drive motor it is a good opportunity to do a deep clean of your machine to help improve its performance, longevity, and safety for use.
Tip 3: Prop up the excavator
Often people simply use the bucket to prop up their excavator when removing their final drive. But it makes sense to prop it up on something more secure in case of hydraulics failure. A couple of sturdy wooden blocks will suffice. You will also need a sling to hand for the moment you pull the final drive motor, which is going to be very heavy! Now you’re ready to think about taking parts off your machine.
Tip 4: Remove the tracks
Before you do anything else, you’ll need to remove the tracks from your mini excavator. Reduce the track tension and the tracks will come off relatively easily. You should then loosen the bolts holding the sprocket and remove both the sprocket and the motor cover. You should also check filters and hydraulic fluids are in good condition before replacing the motor.
Tip 5: Tag Hydraulic Hoses
You’ll need to disconnect the hydraulic hoses before pulling the final drive. But don’t just dive right in. To make installation easier, it’s a good idea to tag the hoses. Ideally, this should be color coordinated so you know which hose goes where when it comes to reinstallation. As soon as you detach a hose you should also cap the ends. This helps to stop dirt from getting inside the mechanics.
Tip 6: Lever out the final drive motor carefully
You should remove any loosened bolts and prepare the sling. Now you’re ready to pull the final drive. You’ll need to lever this out carefully and attach the sling underneath. The final drive motor for a bobcat mini excavator is notoriously heavy. So if you don’t want to cause any damage or injury, you need to take extra care at this stage. A sling makes it much easier to remove a final drive motor safely. So don’t think about doing it without one.
Summing Up
Removing a final drive motor can seem intimidating. But it doesn’t have to be. If you follow the tips above then you’ll ensure you protect your machine. And you’ll make sure you do it safely and with ease. Once you’ve done it once, you will see it isn’t all that difficult either. Just always remember to refer to the manual first and to take care at each stage of the removal process.


