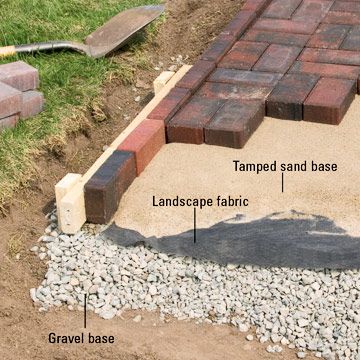
Pavements are used to optimize the life-cycle of different road surfaces, patio, driveways, and pool surrounds. Pavement is the durable surface material laid down on an area intended. Today, permeable paving methods are used in low-impact roadways and walkways. Pavements are crucial as they are eco-friendly, long life, easy to replace, no waste, cost effective solution widely used in many countries which are heavily depend on on-road transportation.
Even though the pavement is widely known phenomena, but we often lack knowledge of how pavement preparation is done. This issue ends here. Given below are seven quick steps through which pavement preparation could be done. Have a look.
Following the steps for pavement preparation
By following a simple step in the order it is possible to create something special.
Step 1
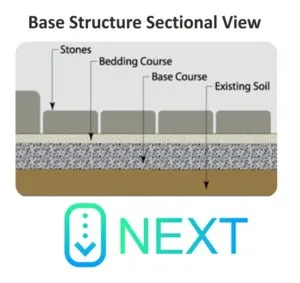
Proper Preparation It is a must for the systematic functioning of the assigned task. the Important works to be carried out before starting the Construction of paved area.
Points to remember
- The areas to be paved must be sketched out
- Clear view about dimensions and laying pattern must be made
- Quantities of Cement and sand required for “Bedding” must be considered.
- Based on the paver size the sub-layers must be made ready where the bedding must
- be spread, if necessary the soft soil must be dug out and replaced with crushed stone.
- The Thickness of the sand must be approximately 40mm between the level of the paved area.
The Final Paving level below the finished paving level should be as follows:
Eg1: For 60mm paving Units: 100mm approximate
Eg2: For 80mm paving units: 120mm approximate
Eg3: For 100mm paving units: 140mm approximate
Step 2
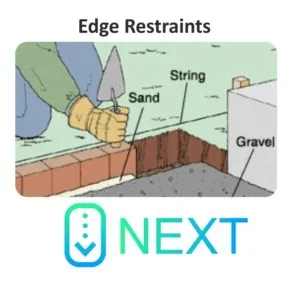
Installation of Edge Restraints: Edges are next important factors which enhance the life and look of the paved area.
Points to remember
- To prevent border erosion, the edges must be considered to enhance the durability of the Pavers.
- Stability to the Edges in the application must be taken care of at the sub-base level.
Step3
Laying Course: This process is done in the basement which consists of well-graded sand, composed of both fine and coarse particles.
Points to remember
- Sand should also be spread uniformly in moisture content and smoothness
- Once after laying the layer must not bear any weight at least a day
- Cement should be kept away from the surface of paving to avoid staining
Step 4
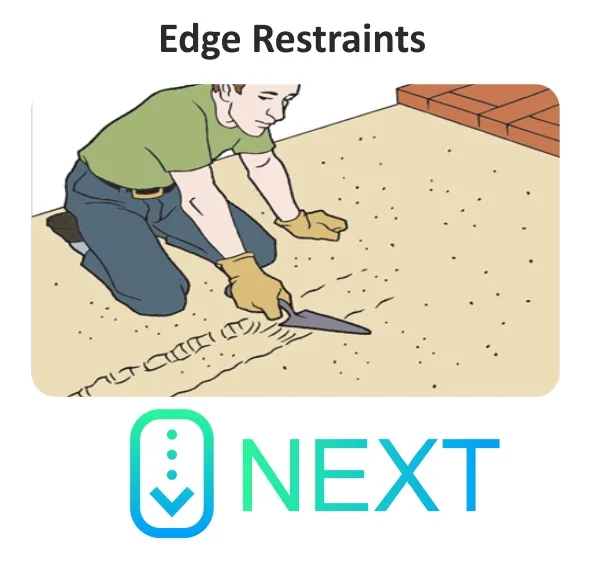
Screeding: It is used for leveling the area placing the paver on the decided area. Screeding can be done either from kerbstone or by using screed rails to level the sand.
Points to remember
- Level of the paver can be checked by placing. Screeding guides range 1″ to 1 ” in diameter
- Once the levels of the pavers are checked guides can be removed & screeding can be continued.
- Usually, laying must be started at the Longest Straight side area, to keep the lines straight.

Step 5
Placing the paving units: Suitability is an important criterion. The pattern of paver must be selected according to the suitability for eg.Herringbone pattern is recommended for most vehicular movement.
Points to remember
- An ideal gap of 3mm ought to be left to ensure an even interlock after Vibration.
- Usually, Laying must be started at the Longest straight side area, to keep the lines straight as this will minimize the amount of cutting required.

Step 6
Vibrator compaction: The Blocks must be swept clean and compacted with a plate vibrator.
Points to remember
- This should be done with a frequency of 75-100 Hz.
- This is to settle the pavers into the bedding sand and creates a smooth and flat surface.
- Vibration must be done at the end of completing a day’s work.

Step7
Joining Sand: Brushing fine sand into the joints of the pavers further locks the pavers together.
Points to remember
- Spread a thin layer of sand evenly over the tops of the pavers.
- Sweep the sand into all the spaces between your pavers, starting on one side and working your way toward the other.
- Sweep any excess sand off of the surface of your pavers. Use a light touch, to avoid disturbing the sand in between the pavers.
- Spray the pavers with water to help pack down the sand in between the pavers and wash any remaining sand from the surface.
- Start over by pouring more sand over the pavers and repeat the process. This will ensure all areas between the stones are filled with sand.
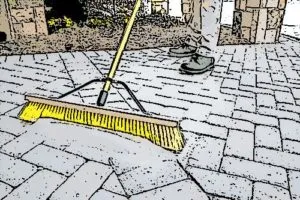
Conclusion: Time to Prevent Water table with Paver Patios
Concrete patio pavers are easily replaced. Instead of having to replace the entire unit, as you would with poured concrete, replacing one patio paver isn’t a problem. pavers tend to be more flexible, Durable, Unlimited design options, Lower maintenance, Repairs are easy, Visually appealing, Do not crack. Water seeps in through these joints, through the open graded gravel base and into the earth. The joints make these pavers 100 percent permeable, which promotes the natural water cycle. Solid concrete driveways and patios work the opposite way.
In our previous post we had shared about Recycling of aggregates, Recycling aggregates derived from crushed concrete, recycled masonry aggregate (originating from masonry rubble), Mixed recycled aggregate, Construction and demolition recycled aggregate (CDRA): aggregate derived from construction and demolition waste which has not been properly processed. Can be used as bedding material. The primary function of pavement is to provide a smooth riding surface and suitable surface friction. Department standards and specifications thoroughly insist on adhering to quality assurance procedures. Productivity and quality control act as key control measures of the project. So next time while preparing pavement keep these guides in mind.
